
Yamaha C1 Music Computer IDE Adapter
IDE disk controller for the highly desirable Yamaha C1 Music Computer.
Description
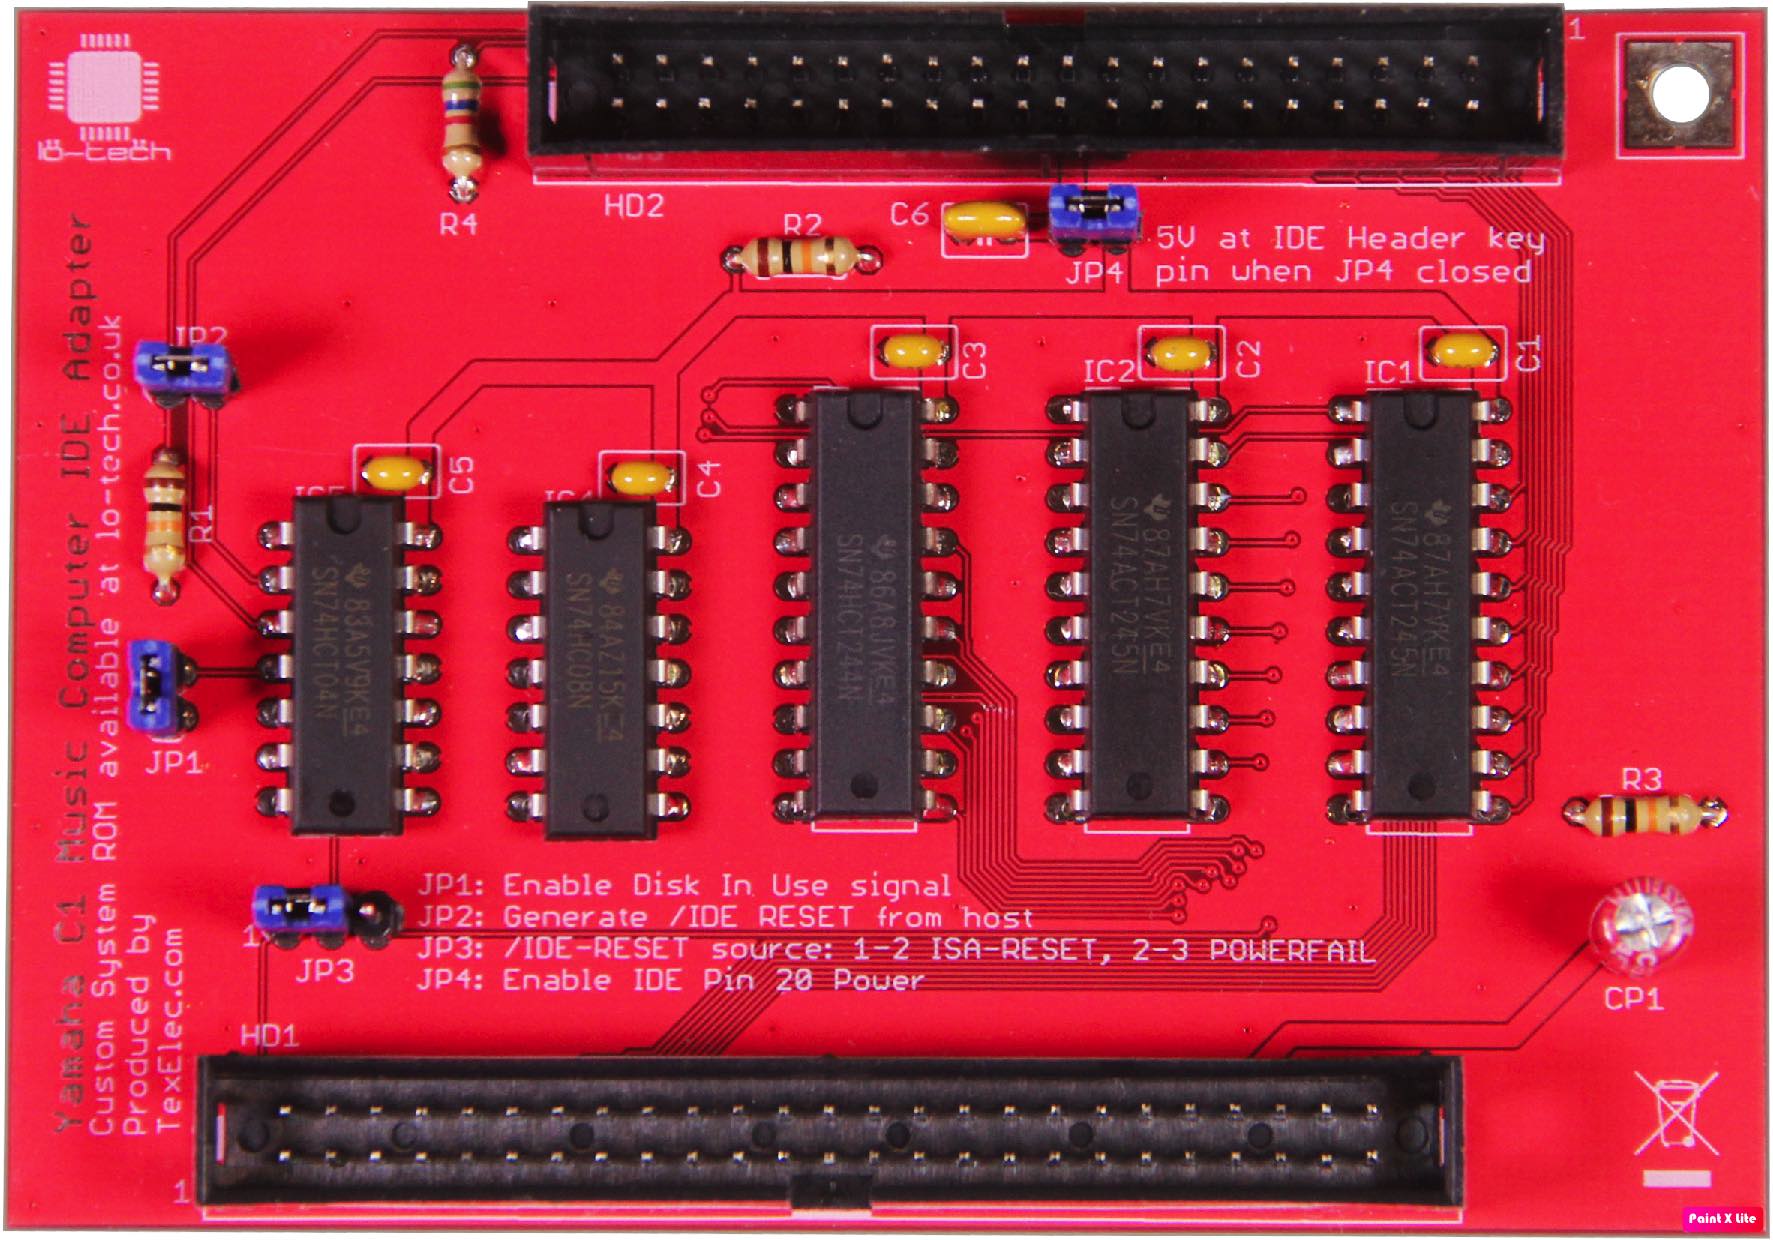
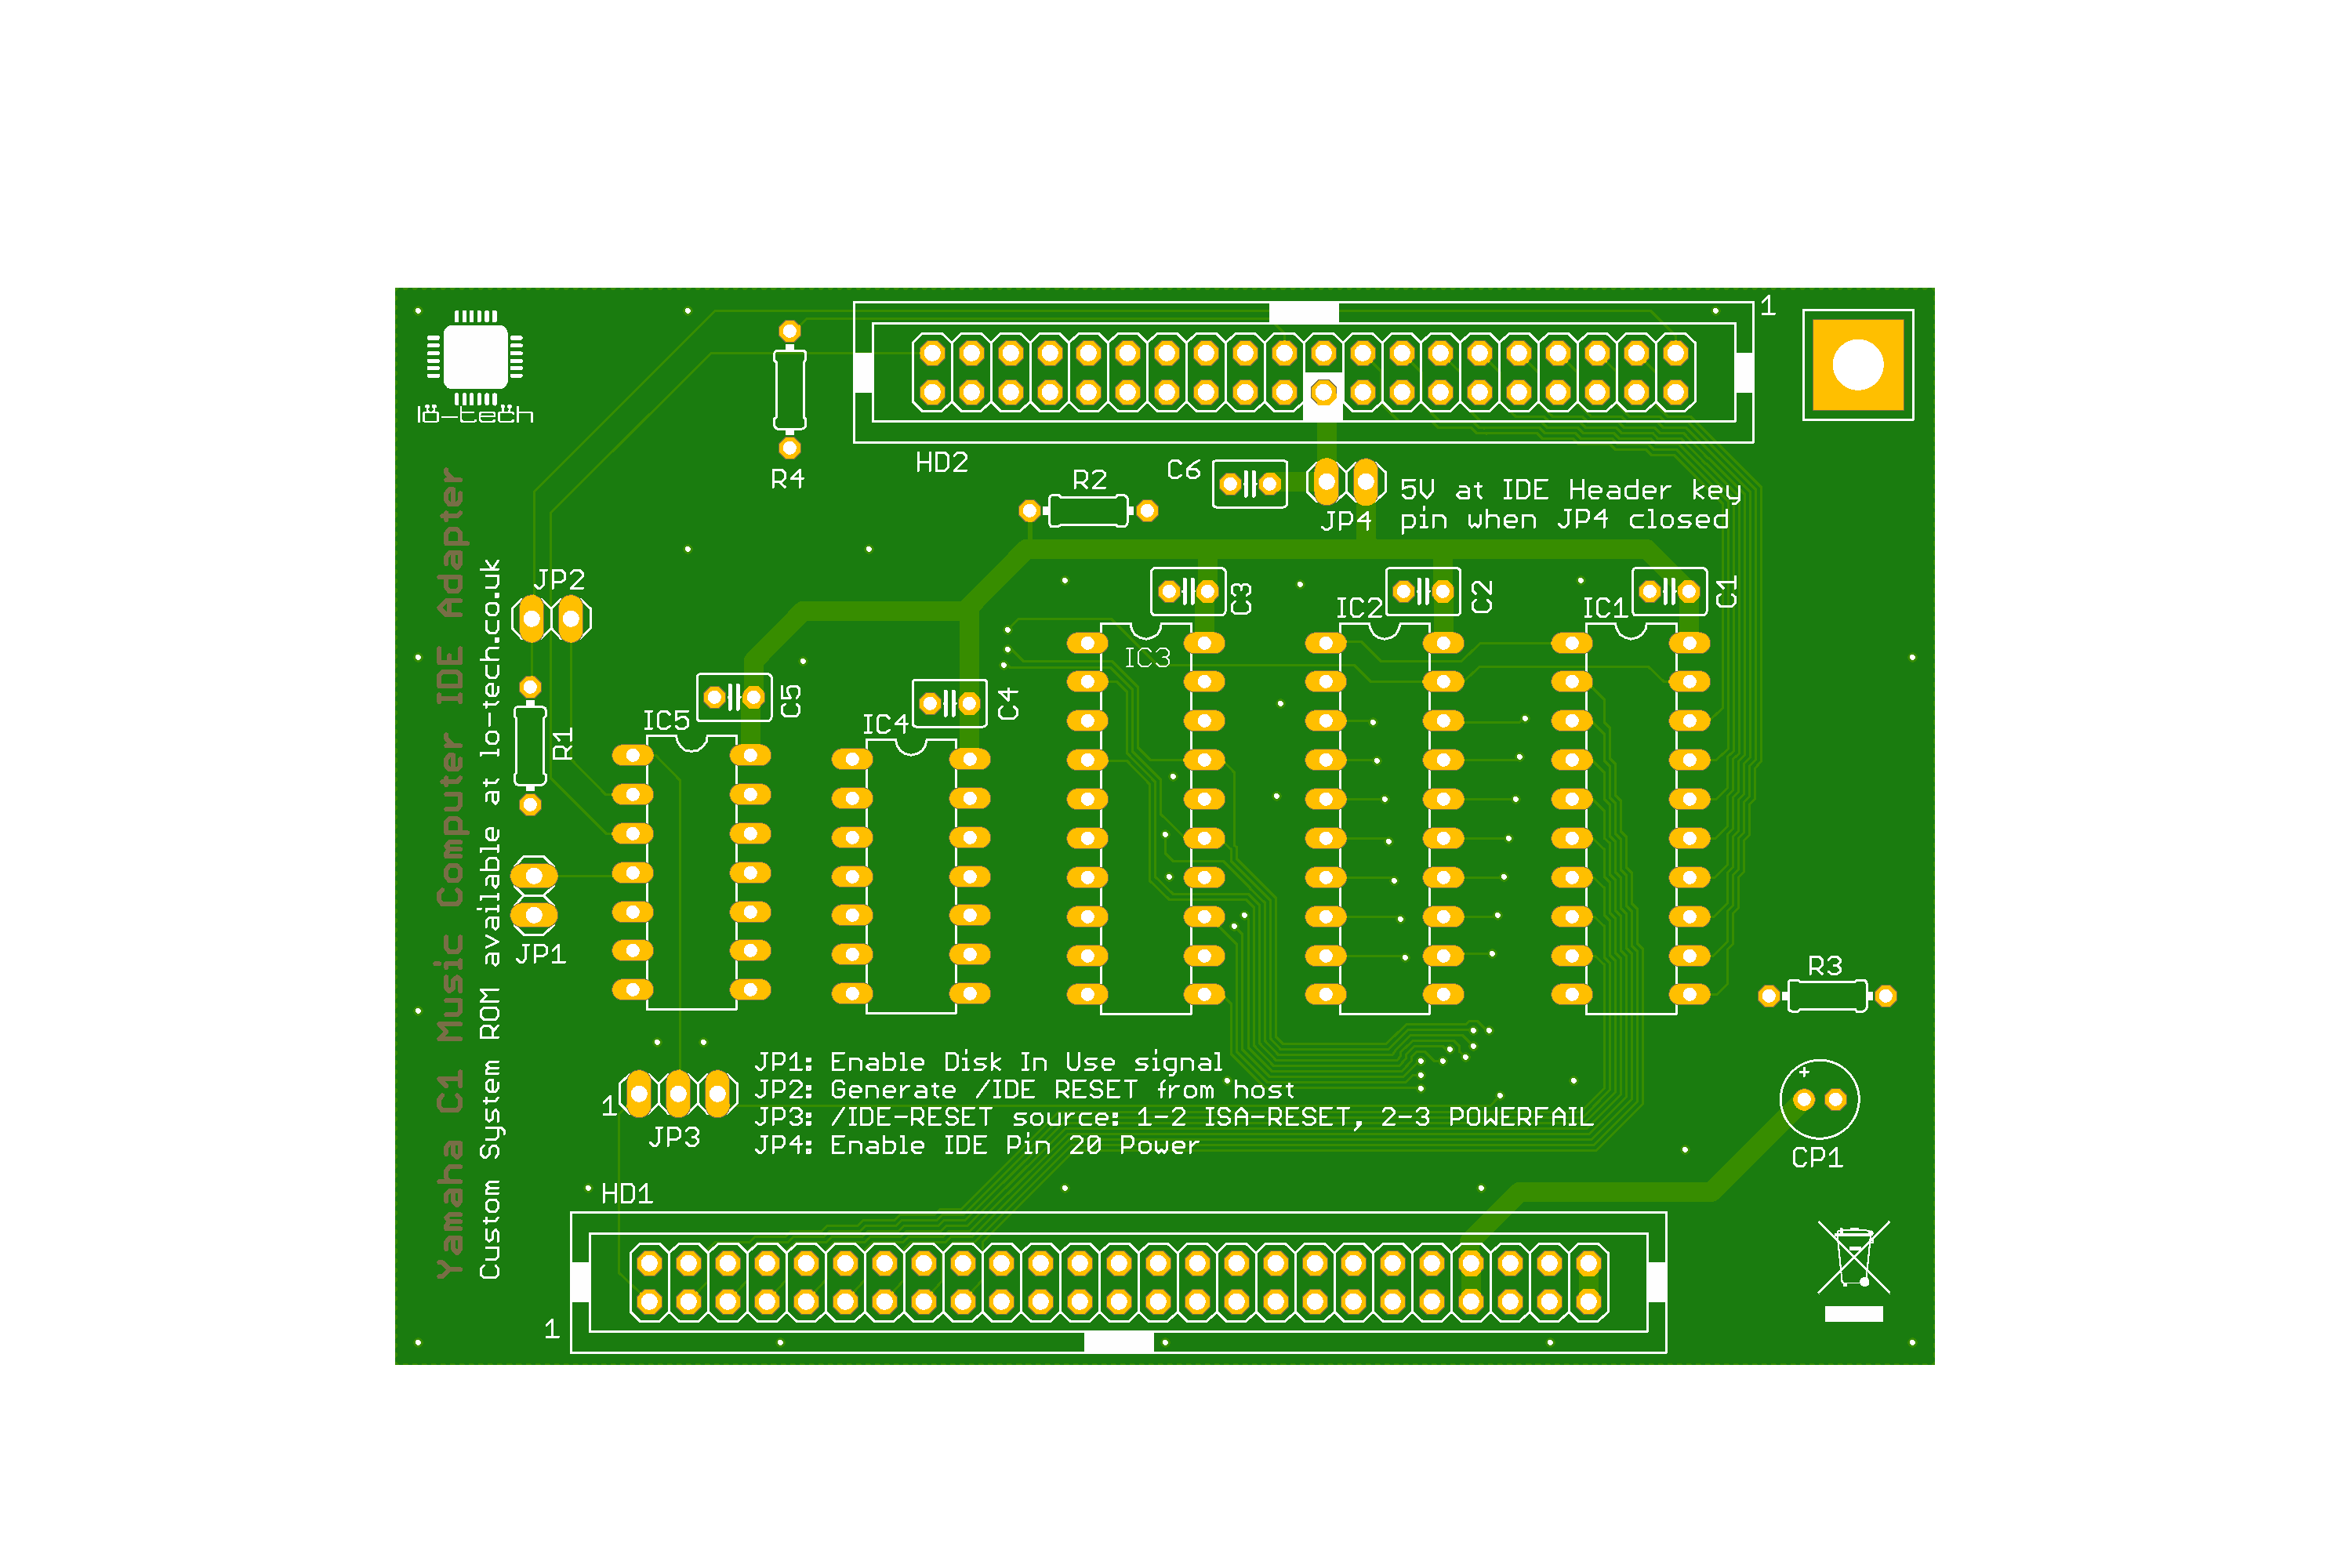
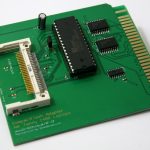
This card is a drop-in replacement for the on-board, non-standard disk controller for the highly desirable Yamaha C1 Music Computer to enable the use of common-place CompactFlash, ATA, or (via an adapter) SATA drives. Possibly the only ever expansion board for this machine!
Available soon at TexElec as an assembled board, the use of this adapter is dependent on replacing the two EPROMs in the machine with a patched version, which includes the XTIDE Universal BIOS.
Full details on this project are provided in the wiki. See also this blog entry.
Additional information
| Weight | 28 g |
|---|
- Is there a development thread?
Yes! The development thread is on the Vintage Computer Forum, here.
- How can I help?
We need anyone with a working C1 to test this PCB. Some electronics and BIOS patching experience is needed. Lo-tech will provide funding towards an assembled adapter (via TexElec) for anyone willing and able to get involved, in exchange for help getting this project finished – please get in touch if you can help.
- This is a prototype, will it damage my machine?
So far, this board has been physically tested in two Yamaha C1 Music Computers. Installing the adapter resulted in a beep code being produced, and it is believed that this relates to the system BIOS patching that is required and/or DIP switch settings. Once removed, the systems were able to boot normally.
- What's needed to get this working?
There are a few aspects to getting this project working and the Yamaha disk controller replaced:
- Physically replacing the adapter and attached drive. The adapter is a drop-in replacement for the Yamaha controller. You’ll also need an ATA (IDE) hard drive or CompactFlash adapter and suitable cables.
- Correctly configuring the system via the DIP switches. This likely requires some trial-and-error, since the machine needs to be configured not to initialise the factory provided HDD BIOS, but retain the ability to run an option ROM. There is also uncertainty in the configuration of the RESET signal (due to contradictory documentation) and whilst provision for this is provided on the adapter via jumpers, this all needs working out.
- Patching in and configuring the XTIDE Universal BIOS. There is plenty of space in the system ROM for the code, and a prototype BIOS is available via the wiki page.
- Patching out the Yamaha disk controller BIOS – Maybe!
In short: a working C1 and time (and inclination) to do some discovery and tinkering.
Reviews
There are no reviews yet.