Unused files
Jump to navigation
Jump to search
The following files exist but are not embedded in any page. Please note that other web sites may link to a file with a direct URL, and so may still be listed here despite being in active use.
Showing below up to 500 results in range #1 to #500.
View (previous 500 | next 500) (20 | 50 | 100 | 250 | 500)
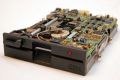
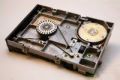
 Tm100-alignment-photo-1.jpg 640 × 480; 182 KB
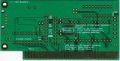
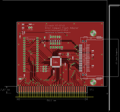
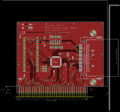
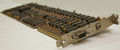
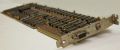
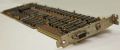
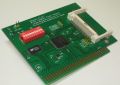
 8bit-rom-board.jpg 732 × 407; 148 KB
 180px-Tandy-1400LT-Catalogue-Page-1988.jpg 180 × 233; 12 KB
 186px-Tandy-1400LT-Catalogue-Page-1988.jpg 186 × 240; 13 KB
 300px-Tandy-1400LT-Catalogue-Page-1988.jpg 300 × 388; 31 KB
 464px-Tandy-1400LT-Catalogue-Page-1988.jpg 464 × 599; 70 KB
 120px-IBM-Portable-Computer-5155.jpg 120 × 53; 5 KB
 180px-IBM-Portable-Computer-5155.jpg 180 × 79; 7 KB
 183px-Lo-tech-1MB-RAM-Board-assembled-r02.jpg 183 × 150; 8 KB
 200px-Tandy-1400LT-Catalogue-Page-1988.jpg 200 × 258; 14 KB
 300px-IBM-Portable-Computer-5155.jpg 300 × 132; 11 KB
 400px-Tandy-1400LT-Catalogue-Page-1988.jpg 400 × 517; 53 KB
 450px-IBM-Portable-Computer-5155.jpg 450 × 198; 18 KB
 600px-Lo-tech-1MB-RAM-Board-assembled-r02.jpg 600 × 493; 59 KB
 729px-Lo-tech-1MB-RAM-Board-assembled-r02.jpg 729 × 599; 84 KB
 93px-Tandy-1400LT-Catalogue-Page-1988.jpg 93 × 120; 4 KB
 120px-Lo-tech-1MB-RAM-Board-assembled-r02.jpg 120 × 99; 4 KB
 120px-Lo-tech-ISA-USB-Adapter-PCB-Back.JPG 120 × 60; 3 KB
 120px-Tm100-alignment-photo-1.jpg 120 × 90; 8 KB
 180px-Lo-tech-ISA-USB-Adapter-PCB-Back.JPG 180 × 91; 6 KB
 180px-Tm100-alignment-photo-1.jpg 180 × 135; 12 KB
 300px-Lo-tech-1MB-RAM-Board-assembled-r02.jpg 300 × 247; 17 KB
 450px-Lo-tech-1MB-RAM-Board-assembled-r02.jpg 450 × 370; 37 KB
 480px-Tm100-alignment-photo-1.jpg 480 × 360; 52 KB
 730px-Lo-tech-1MB-RAM-Board-assembled-r02.jpg 730 × 600; 84 KB
 800px-Lo-tech-ISA-USB-Adapter-PCB-Back.JPG 800 × 403; 79 KB
 120px-Qumetrak-142-floppy-drive-front.jpg 120 × 80; 3 KB
 120px-Tandy-1000-Keyboard-Protocol-Sample.png 120 × 30; 6 KB
 200px-Lo-tech-ISA-USB-Adapter-PCB-Back.JPG 200 × 101; 7 KB
 200px-Qumetrak-142-floppy-drive-front.jpg 200 × 133; 6 KB
 320px-Qumetrak-142-floppy-drive-front.jpg 320 × 213; 13 KB
 400px-Qumetrak-142-floppy-drive-front.jpg 400 × 267; 19 KB
 480px-Qumetrak-142-floppy-drive-front.jpg 480 × 320; 25 KB
 640px-Qumetrak-142-floppy-drive-front.jpg 640 × 426; 38 KB
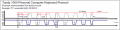 640px-Tandy-1000-Keyboard-Protocol-Sample.png 640 × 162; 55 KB
 800px-Tandy-1000-Keyboard-Protocol-Sample.png 800 × 203; 72 KB
 120px-8bit-rom-board.jpg 120 × 67; 3 KB
 120px-Lo-tech-1MB-RAM-Board-schematic-r02.png 120 × 93; 8 KB
 180px-8bit-rom-board.jpg 180 × 100; 5 KB
 180px-Lo-tech-1MB-RAM-Board-schematic-r02.png 180 × 139; 14 KB
 194px-Lo-tech-1MB-RAM-Board-schematic-r02.png 194 × 150; 15 KB
 300px-8bit-rom-board.jpg 300 × 167; 14 KB
 300px-Qumetrak-142-floppy-drive-front.jpg 300 × 200; 12 KB
 450px-8bit-rom-board.jpg 450 × 250; 33 KB
 600px-8bit-rom-board.jpg 600 × 334; 56 KB
 775px-Lo-tech-1MB-RAM-Board-schematic-r02.png 775 × 599; 118 KB
 100px-Crossed wheeled bin with bar.jpg 100 × 138; 3 KB
 180px-Crossed wheeled bin with bar.jpg 180 × 248; 6 KB
 200px-Crossed wheeled bin with bar.jpg 200 × 276; 8 KB
 300px-Crossed wheeled bin with bar.jpg 300 × 414; 12 KB
 400px-Crossed wheeled bin with bar.jpg 400 × 552; 18 KB
 434px-Crossed wheeled bin with bar.jpg 434 × 599; 20 KB
 435px-Crossed wheeled bin with bar.jpg 435 × 600; 20 KB
 450px-Crossed wheeled bin with bar.jpg 450 × 621; 21 KB
 600px-Crossed wheeled bin with bar.jpg 600 × 828; 33 KB
 776px-Lo-tech-1MB-RAM-Board-schematic-r02.png 776 × 600; 119 KB
 87px-Crossed wheeled bin with bar.jpg 87 × 120; 3 KB
 120px-Xilinx-parallel-cable-iii.jpg 120 × 79; 5 KB
 150px-Crossed wheeled bin with bar.jpg 150 × 207; 5 KB
 180px-Xilinx-parallel-cable-iii.jpg 180 × 119; 7 KB
 270px-Xilinx-parallel-cable-iii.jpg 270 × 178; 10 KB
 300px-Lo-tech-xt-cfv3.JPG 300 × 200; 8 KB
 320px-Lo-tech-xt-cfv3.JPG 320 × 213; 9 KB
 360px-Xilinx-parallel-cable-iii.jpg 360 × 237; 14 KB
 450px-Lo-tech-xt-cfv3.JPG 450 × 300; 16 KB
 600px-Lo-tech-xt-cfv3.JPG 600 × 400; 26 KB
 640px-Lo-tech-xt-cfv3.JPG 640 × 426; 29 KB
 120px-Lo-tech-xt-cfv2-prototype.JPG 120 × 91; 3 KB
 120px-Lo-tech-xt-cfv3.JPG 120 × 80; 2 KB
 180px-Lo-tech-xt-cfv3.JPG 180 × 120; 4 KB
 300px-Lo-tech-xt-cfv2-prototype.JPG 300 × 228; 12 KB
 316px-Lo-tech-xt-cfv2-prototype.JPG 316 × 240; 13 KB
 450px-Lo-tech-xt-cfv2-prototype.JPG 450 × 341; 23 KB
 600px-Lo-tech-xt-cfv2-prototype.JPG 600 × 455; 38 KB
 633px-Lo-tech-xt-cfv2-prototype.JPG 633 × 480; 42 KB
 790px-Lo-tech-xt-cfv2-prototype.JPG 790 × 599; 61 KB
 791px-Lo-tech-xt-cfv2-prototype.JPG 791 × 600; 61 KB
 800px-Lo-tech-xt-cfv3.JPG 800 × 533; 42 KB
 120px-Lo-tech-ISA-USB-adapter-schematic.png 120 × 78; 10 KB
 120px-Yamaha-C1-IDE-Assembled-Front.jpg 120 × 84; 6 KB
 180px-Lo-tech-ISA-USB-adapter-schematic.png 180 × 117; 19 KB
 180px-Lo-tech-xt-cfv2-prototype.JPG 180 × 137; 5 KB
 200px-Lo-tech-ISA-USB-adapter-schematic.png 200 × 130; 21 KB
 300px-Yamaha-C1-IDE-Assembled-Front.jpg 300 × 210; 20 KB
 450px-Yamaha-C1-IDE-Assembled-Front.jpg 450 × 315; 39 KB
 600px-Yamaha-C1-IDE-Assembled-Front.jpg 600 × 420; 60 KB
 800px-Lo-tech-ISA-USB-adapter-schematic.png 800 × 518; 175 KB
 800px-Yamaha-C1-IDE-Assembled-Front.jpg 800 × 560; 92 KB
 120px-Lo-tech-8-bit-ide-adapter-rev3-front.jpg 120 × 95; 4 KB
 180px-1MB-RAM-Board-r02-Top.png 180 × 148; 31 KB
 180px-Lo-tech-8-bit-ide-adapter-rev3-front.jpg 180 × 143; 10 KB
 183px-1MB-RAM-Board-r02-Top.png 183 × 150; 31 KB
 189px-Lo-tech-8-bit-ide-adapter-rev3-front.jpg 189 × 150; 10 KB
 200px-Yamaha-C1-IDE-Assembled-Front.jpg 200 × 140; 11 KB
 300px-Lo-tech-8-bit-ide-adapter-rev3-front.jpg 300 × 239; 25 KB
 450px-Lo-tech-8-bit-ide-adapter-rev3-front.jpg 450 × 358; 57 KB
 600px-Lo-tech-8-bit-ide-adapter-rev3-front.jpg 600 × 477; 101 KB
 730px-1MB-RAM-Board-r02-Top.png 730 × 600; 215 KB
 754px-Lo-tech-8-bit-ide-adapter-rev3-front.jpg 754 × 600; 161 KB
 120px-1MB-RAM-Board-r02-Top.png 120 × 99; 16 KB
 120px-Lo-tech-trs-80-ide-adapter-rev2-schematic.png 120 × 81; 12 KB
 120px-Yamaha-C1-HDD-PCB-r01.png 120 × 80; 9 KB
 180px-Lo-tech-trs-80-ide-adapter-rev2-schematic.png 180 × 121; 20 KB
 180px-Yamaha-C1-HDD-PCB-r01.png 180 × 120; 17 KB
 200px-Lo-tech-trs-80-ide-adapter-rev2-schematic.png 200 × 134; 25 KB
 300px-Yamaha-C1-HDD-PCB-r01.png 300 × 200; 32 KB
 450px-Yamaha-C1-HDD-PCB-r01.png 450 × 300; 63 KB
 600px-Yamaha-C1-HDD-PCB-r01.png 600 × 400; 78 KB
 800px-Lo-tech-trs-80-ide-adapter-rev2-schematic.png 800 × 537; 198 KB
 120px-Lo-tech-8-bit-ide-adapter-rev2-schematic.png 120 × 93; 11 KB
 180px-Jride-isa-adapter.JPG 180 × 135; 6 KB
 180px-Lo-tech-8-bit-ide-adapter-rev2-schematic.png 180 × 139; 20 KB
 194px-Lo-tech-8-bit-ide-adapter-rev2-schematic.png 194 × 150; 22 KB
 200px-Yamaha-C1-HDD-PCB-r01.png 200 × 133; 22 KB
 640px-Jride-isa-adapter.JPG 640 × 480; 48 KB
 775px-Lo-tech-8-bit-ide-adapter-rev2-schematic.png 775 × 599; 176 KB
 776px-Lo-tech-8-bit-ide-adapter-rev2-schematic.png 776 × 600; 179 KB
 800px-Jride-isa-adapter.JPG 800 × 600; 69 KB
 800px-Yamaha-C1-HDD-PCB-r01.png 800 × 533; 142 KB
 120px-Jride-isa-adapter.JPG 120 × 90; 3 KB
 120px-Lo-tech-ISA-USB-Adapter-PCB-Front.JPG 120 × 60; 3 KB
 180px-Lo-tech-ISA-USB-Adapter-PCB-Front.JPG 180 × 89; 6 KB
 185px-Lo-tech-2MB-EMS-board-pcb.JPG 185 × 150; 9 KB
 200px-Lo-tech-ISA-USB-Adapter-PCB-Front.JPG 200 × 99; 7 KB
 300px-Lo-tech-ISA-USB-Adapter-PCB-Front.JPG 300 × 149; 16 KB
 320px-Jride-isa-adapter.JPG 320 × 240; 16 KB
 450px-Lo-tech-ISA-USB-Adapter-PCB-Front.JPG 450 × 224; 32 KB
 600px-Lo-tech-ISA-USB-Adapter-PCB-Front.JPG 600 × 298; 56 KB
 800px-Lo-tech-ISA-USB-Adapter-PCB-Front.JPG 800 × 398; 90 KB
 120px-Lo-tech-2MB-EMS-board-pcb.JPG 120 × 98; 4 KB
 120px-Xt-cfv3-pcb.png 120 × 112; 16 KB
 180px-Lo-tech-2MB-EMS-board-pcb.JPG 180 × 146; 9 KB
 180px-Xt-cfv3-pcb.png 180 × 168; 31 KB
 258px-Xt-cfv3-pcb.png 258 × 240; 57 KB
 300px-Xt-cfv3-pcb.png 300 × 279; 72 KB
 450px-Xt-cfv3-pcb.png 450 × 419; 142 KB
 515px-Xt-cfv3-pcb.png 515 × 480; 179 KB
 600px-Xt-cfv3-pcb.png 600 × 559; 222 KB
 644px-Xt-cfv3-pcb.png 644 × 600; 257 KB
 738px-Lo-tech-2MB-EMS-board-pcb.JPG 738 × 600; 132 KB
 120px-Lo-tech-ISA-Slot-Bracket-Type-2.jpg 120 × 113; 3 KB
 120px-Qumetrak-142-floppy-drive-underside.jpg 120 × 80; 3 KB
 159px-Lo-tech-ISA-Slot-Bracket-Type-2.jpg 159 × 150; 5 KB
 200px-Qumetrak-142-floppy-drive-underside.jpg 200 × 133; 7 KB
 300px-Lo-tech-gpio-interface-board-mounted-on-RaspberryPi-Bplus.JPG 300 × 211; 10 KB
 300px-Qumetrak-142-floppy-drive-underside.jpg 300 × 200; 14 KB
 400px-Qumetrak-142-floppy-drive-underside.jpg 400 × 267; 22 KB
 600px-Lo-tech-gpio-interface-board-mounted-on-RaspberryPi-Bplus.JPG 600 × 421; 30 KB
 635px-Lo-tech-ISA-Slot-Bracket-Type-2.jpg 635 × 599; 63 KB
 636px-Lo-tech-ISA-Slot-Bracket-Type-2.jpg 636 × 600; 63 KB
 120px-74hct02-chip-mod-3.JPG 120 × 75; 1 KB
 120px-Xt-cf-isa-slot-bracket-1.jpg 120 × 89; 2 KB
 180px-Xt-cf-isa-slot-bracket-1.jpg 180 × 134; 3 KB
 200px-74hct02-chip-mod-3.JPG 200 × 125; 2 KB
 200px-Xt-cf-isa-slot-bracket-1.jpg 200 × 149; 4 KB
 450px-Lo-tech-gpio-interface-board-mounted-on-RaspberryPi-Bplus.JPG 450 × 316; 19 KB
 800px-74hct02-chip-mod-3.JPG 800 × 501; 27 KB
 800px-Lo-tech-gpio-interface-board-mounted-on-RaspberryPi-Bplus.JPG 800 × 561; 47 KB
 800px-Xt-cf-isa-slot-bracket-1.jpg 800 × 594; 35 KB
 120px-ISA-ROM-Board-Assembled.jpg 120 × 78; 3 KB
 120px-XT-CF-ISA-B8-Jumper-Wire.jpg 120 × 91; 4 KB
 180px-XT-CF-ISA-B8-Jumper-Wire.jpg 180 × 137; 7 KB
 200px-ISA-ROM-Board-Assembled.jpg 200 × 129; 6 KB
 300px-ISA-ROM-Board-Assembled.jpg 300 × 194; 11 KB
 320px-Lo-tech-isa-compactflash-adapter-back.JPG 320 × 200; 14 KB
 450px-ISA-ROM-Board-Assembled.jpg 450 × 291; 22 KB
 600px-ISA-ROM-Board-Assembled.jpg 600 × 388; 36 KB
 788px-XT-CF-ISA-B8-Jumper-Wire.jpg 788 × 600; 117 KB
 800px-ISA-ROM-Board-Assembled.jpg 800 × 517; 59 KB
 120px-Lo-tech-isa-compactflash-adapter-back.JPG 120 × 75; 3 KB
 120px-Lo-tech-trs-80-ide-adapter-first-assembled.JPG 120 × 86; 4 KB
 180px-Lo-tech-isa-compactflash-adapter-back.JPG 180 × 113; 5 KB
 180px-Lo-tech-trs-80-ide-adapter-first-assembled.JPG 180 × 129; 9 KB
 200px-Lo-tech-trs-80-ide-adapter-first-assembled.JPG 200 × 143; 10 KB
 300px-Lo-tech-isa-compactflash-adapter-back.JPG 300 × 188; 12 KB
 450px-Lo-tech-isa-compactflash-adapter-back.JPG 450 × 282; 24 KB
 600px-Lo-tech-isa-compactflash-adapter-back.JPG 600 × 376; 38 KB
 640px-Lo-tech-isa-compactflash-adapter-back.JPG 640 × 401; 42 KB
 800px-Lo-tech-isa-compactflash-adapter-back.JPG 800 × 501; 58 KB
 800px-Lo-tech-trs-80-ide-adapter-first-assembled.JPG 800 × 573; 131 KB
 120px-Lo-tech-gpio-interface-board-front-assembled-rev2.JPG 120 × 97; 4 KB
 120px-Lo-tech-isa-compactflash-adapter-rev-2.JPG 120 × 66; 3 KB
 180px-Lo-tech-isa-compactflash-adapter-rev-2.JPG 180 × 98; 6 KB
 200px-Lo-tech-isa-compactflash-adapter-rev-2.JPG 200 × 109; 7 KB
 300px-Lo-tech-isa-compactflash-adapter-rev-2.JPG 300 × 164; 17 KB
 320px-Lo-tech-isa-compactflash-adapter-rev-2.JPG 320 × 175; 19 KB
 450px-Lo-tech-isa-compactflash-adapter-rev-2.JPG 450 × 246; 39 KB
 600px-Lo-tech-isa-compactflash-adapter-rev-2.JPG 600 × 328; 71 KB
 640px-Lo-tech-isa-compactflash-adapter-rev-2.JPG 640 × 350; 79 KB
 800px-Lo-tech-isa-compactflash-adapter-rev-2.JPG 800 × 437; 117 KB
 120px-IBM-PS-2-Keyboard-Protocol-Sample.png 120 × 51; 10 KB
 150px-Lo-tech-gpio-interface-board-front-assembled-rev2.JPG 150 × 121; 5 KB
 180px-Lo-tech-gpio-interface-board-front-assembled-rev2.JPG 180 × 145; 7 KB
 180px-Lo-tech-trs-80-ide-adapter-assembled.JPG 180 × 144; 8 KB
 188px-Lo-tech-trs-80-ide-adapter-assembled.JPG 188 × 150; 9 KB
 320px-IBM-PS-2-Keyboard-Protocol-Sample.png 320 × 136; 42 KB
 640px-IBM-PS-2-Keyboard-Protocol-Sample.png 640 × 272; 106 KB
 745px-Lo-tech-gpio-interface-board-front-assembled-rev2.JPG 745 × 599; 67 KB
 746px-Lo-tech-gpio-interface-board-front-assembled-rev2.JPG 746 × 600; 67 KB
 750px-Lo-tech-trs-80-ide-adapter-assembled.JPG 750 × 600; 90 KB
 800px-IBM-PS-2-Keyboard-Protocol-Sample.png 800 × 340; 142 KB
 120px-Lo-tech-trs-80-ide-adapter-assembled.JPG 120 × 96; 4 KB
 120px-Lo-tech-trs-80-ide-adapter-rev2-assembled.JPG 120 × 93; 3 KB
 180px-Lo-tech-trs-80-ide-adapter-rev2-assembled.JPG 180 × 139; 6 KB
 194px-Lo-tech-trs-80-ide-adapter-rev2-assembled.JPG 194 × 150; 7 KB
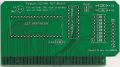
 200px-ISA-ROM-Board-r03-top.png 200 × 112; 39 KB
 774px-Lo-tech-trs-80-ide-adapter-rev2-assembled.JPG 774 × 600; 75 KB
 120px-ISA-ROM-Board-r03-top.png 120 × 67; 16 KB
 120px-Lo-tech-VGA-interface-board-mounted.jpg 120 × 80; 3 KB
 150px-Lo-tech-VGA-interface-board-mounted.jpg 150 × 100; 4 KB
 180px-Lo-tech-VGA-interface-board-mounted.jpg 180 × 120; 5 KB
 180px-Lo-tech-trs-80-ide-adapter.png 180 × 146; 48 KB
 300px-Lo-tech-VGA-interface-board-mounted.jpg 300 × 200; 13 KB
 450px-Lo-tech-VGA-interface-board-mounted.jpg 450 × 300; 26 KB
 600px-Lo-tech-VGA-interface-board-mounted.jpg 600 × 400; 44 KB
 800px-ISA-ROM-Board-r03-top.png 800 × 448; 548 KB
 800px-Lo-tech-VGA-interface-board-mounted.jpg 800 × 533; 75 KB
 120px-Lo-tech-trs-80-ide-adapter.png 120 × 97; 24 KB
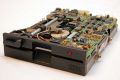
 120px-Tm100-alignment-photo-3.jpg 120 × 90; 7 KB
 185px-Lo-tech-trs-80-ide-adapter.png 185 × 150; 50 KB
 296px-Lo-tech-trs-80-ide-adapter.png 296 × 240; 107 KB
 300px-Lo-tech-trs-80-ide-adapter.png 300 × 243; 109 KB
 370px-Lo-tech-trs-80-ide-adapter.png 370 × 300; 151 KB
 450px-Lo-tech-trs-80-ide-adapter.png 450 × 365; 204 KB
 480px-Tm100-alignment-photo-3.jpg 480 × 360; 35 KB
 593px-Lo-tech-trs-80-ide-adapter.png 593 × 480; 299 KB
 600px-Lo-tech-trs-80-ide-adapter.png 600 × 486; 305 KB
 740px-Lo-tech-trs-80-ide-adapter.png 740 × 600; 402 KB
 120px-IMG 8782.JPG 120 × 96; 4 KB
 120px-Lo-tech-GPIO-Interface-r02-Application-Notes.png 120 × 67; 5 KB
 120px-Lo-tech-Yamaha-C1-HDD-Schematic-r01.png 120 × 81; 9 KB
 120px-Lo-tech-gpio-interface-board-back-assembled.JPG 120 × 93; 3 KB
 150px-Lo-tech-gpio-interface-board-back-assembled.JPG 150 × 116; 5 KB
 180px-IMG 8782.JPG 180 × 144; 8 KB
 194px-Lo-tech-gpio-interface-board-back-assembled.JPG 194 × 150; 7 KB
 200px-Lo-tech-Yamaha-C1-HDD-Schematic-r01.png 200 × 135; 17 KB
 750px-IMG 8782.JPG 750 × 600; 90 KB
 774px-Lo-tech-gpio-interface-board-back-assembled.JPG 774 × 600; 59 KB
 800px-Lo-tech-Yamaha-C1-HDD-Schematic-r01.png 800 × 538; 131 KB
 120px-2MB-EMS-Board-r02-front.png 120 × 98; 18 KB
 120px-74hct02-chip-mod-2.JPG 120 × 78; 1 KB
 120px-Lo-tech-GPIO-Interface-r02-Schematic.png 120 × 83; 11 KB
 120px-Lo-tech-ISA-Slot-Bracket-Type-3.jpg 120 × 100; 2 KB
 120px-Lo-tech-trs-80-ide-adapter-pcb.png 120 × 105; 19 KB
 120px-Lo-tech-trs-80-ide-adapter-schematic.png 120 × 81; 12 KB
 120px-Yamaha-C1-IDE-Assembled-Back.jpg 120 × 84; 5 KB
 200px-74hct02-chip-mod-2.JPG 200 × 130; 3 KB
 800px-74hct02-chip-mod-2.JPG 800 × 519; 34 KB
 87px-Recycle now logo black white.JPG 87 × 120; 3 KB
 96px-Lo-tech-trs-80-ide-adapter-pcb.jpg 96 × 119; 4 KB
 120px-Lo-tech-xt-cf-lite-assembled.JPG 120 × 91; 3 KB
 197px-Lo-tech-xt-cf-lite-assembled.JPG 197 × 150; 7 KB
 300px-Lo-tech-xt-cf-lite-assembled.JPG 300 × 228; 13 KB
 316px-Lo-tech-xt-cf-lite-assembled.JPG 316 × 240; 14 KB
 600px-Lo-tech-xt-cf-lite-assembled.JPG 600 × 456; 37 KB
 631px-Lo-tech-xt-cf-lite-assembled.JPG 631 × 480; 40 KB
 788px-Lo-tech-xt-cf-lite-assembled.JPG 788 × 599; 55 KB
 120px-ISA-ROM-Board-r03-schematic.png 120 × 78; 8 KB
 180px-Lo-tech-xt-cf-lite-assembled.JPG 180 × 137; 6 KB
 200px-ISA-ROM-Board-r03-schematic.png 200 × 130; 16 KB
 450px-Lo-tech-xt-cf-lite-assembled.JPG 450 × 342; 23 KB
 789px-Lo-tech-xt-cf-lite-assembled.JPG 789 × 600; 55 KB
 800px-ISA-ROM-Board-r03-schematic.png 800 × 518; 133 KB
 180px-Lo-tech-isa-compactflash-adapter-front.JPG 180 × 99; 4 KB
 300px-Lo-tech-isa-compactflash-adapter-front.JPG 300 × 166; 10 KB
 320px-Lo-tech-isa-compactflash-adapter-front.JPG 320 × 177; 11 KB
 600px-Lo-tech-isa-compactflash-adapter-front.JPG 600 × 331; 28 KB
 640px-Lo-tech-isa-compactflash-adapter-front.JPG 640 × 353; 32 KB
 120px-Lo-tech-isa-compactflash-adapter-front.JPG 120 × 66; 2 KB
 180px-Inside-ms-dos-figure-5a.gif 180 × 143; 5 KB
 320px-Inside-ms-dos-figure-5a.gif 320 × 254; 12 KB
 450px-Lo-tech-isa-compactflash-adapter-front.JPG 450 × 248; 18 KB
 480px-Inside-ms-dos-figure-5a.gif 480 × 380; 21 KB
 800px-Lo-tech-isa-compactflash-adapter-front.JPG 800 × 441; 44 KB
 120px-Inside-ms-dos-figure-5a.gif 120 × 95; 3 KB
 120px-Xt-cf-isa-slot-bracket-2.jpg 120 × 75; 2 KB
 1200px-Tandy-Sound-Adapter-r01.png 1,200 × 808; 212 KB
 120px-Lo-tech-ISA-CompactFlash-Adapter-rev2-Schematic.png 120 × 78; 10 KB
 120px-ST251-connections.jpg 120 × 85; 3 KB
 180px-Tandy-Sound-Adapter-r01.png 180 × 121; 13 KB
 180px-Xt-cf-isa-slot-bracket-2.jpg 180 × 113; 3 KB
 200px-Lo-tech-ISA-CompactFlash-Adapter-rev2-Schematic.png 200 × 130; 21 KB
 200px-Xt-cf-isa-slot-bracket-2.jpg 200 × 125; 4 KB
 800px-Lo-tech-ISA-CompactFlash-Adapter-rev2-Schematic.png 800 × 518; 176 KB
 800px-Tandy-Sound-Adapter-r01.png 800 × 539; 120 KB
 800px-Xt-cf-isa-slot-bracket-2.jpg 800 × 502; 33 KB
 106px-Lo-tech-GPIO-Interface-r02-Application-Notes.png 106 × 120; 9 KB
 120px-Tandy-Sound-Adapter-r01.png 120 × 81; 7 KB
 1600px-Tandy-Sound-Adapter-r01.png 1,600 × 1,077; 308 KB
 180px-Bus-pirate.jpg 180 × 135; 7 KB
 180px-Lo-tech-GPIO-Interface-r02-Application-Notes.png 180 × 204; 18 KB
 199px-Lo-tech-GPIO-Interface-r02-Application-Notes.png 199 × 225; 21 KB
 480px-Tandy-Sound-Adapter-r01.png 480 × 323; 56 KB
 530px-Lo-tech-GPIO-Interface-r02-Application-Notes.png 530 × 599; 86 KB
 531px-Lo-tech-GPIO-Interface-r02-Application-Notes.png 531 × 600; 86 KB
 720px-Tandy-Sound-Adapter-r01.png 720 × 485; 102 KB
 960px-Tandy-Sound-Adapter-r01.png 960 × 646; 157 KB
 120px-Amstrad-PC1512-Keyboard-Protocol-Sample.png 120 × 30; 5 KB
 120px-Bus-pirate.jpg 120 × 90; 4 KB
 180px-Z80-CPU-Pinout.jpg 180 × 139; 5 KB
 270px-Bus-pirate.jpg 270 × 203; 14 KB
 270px-Z80-CPU-Pinout.jpg 270 × 208; 9 KB
 360px-Bus-pirate.jpg 360 × 270; 22 KB
 360px-Z80-CPU-Pinout.jpg 360 × 278; 15 KB
 450px-Z80-CPU-Pinout.jpg 450 × 347; 22 KB
 600px-Z80-CPU-Pinout.jpg 600 × 463; 34 KB
 640px-Amstrad-PC1512-Keyboard-Protocol-Sample.png 640 × 162; 53 KB
 799px-Amstrad-PC1512-Keyboard-Protocol-Sample.png 799 × 202; 69 KB
 120px-Ibm-color-graphics-card.jpg 120 × 50; 5 KB
 120px-Lo-tech-8-bit-ide-adapter-rev3-schematic.png 120 × 93; 11 KB
 120px-Z80-CPU-Pinout.jpg 120 × 93; 2 KB
 200px-Ibm-color-graphics-card.jpg 200 × 84; 8 KB
 300px-Ibm-color-graphics-card.jpg 300 × 125; 12 KB
 300px-Z80-CPU-Pinout.jpg 300 × 231; 11 KB
 400px-Ibm-color-graphics-card.jpg 400 × 167; 17 KB
 450px-Ibm-color-graphics-card.jpg 450 × 188; 20 KB
 600px-Ibm-color-graphics-card.jpg 600 × 251; 30 KB
 775px-Lo-tech-8-bit-ide-adapter-rev3-schematic.png 775 × 599; 185 KB
 778px-Z80-CPU-Pinout.jpg 778 × 600; 47 KB
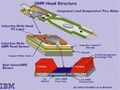 120px-GMR-head-structure.jpg 120 × 90; 4 KB
 120px-Lo-tech-gpio-interface-board-back.JPG 120 × 102; 4 KB
 147px-Lo-tech-gpio-interface-board-back.JPG 147 × 125; 5 KB
 150px-Lo-tech-gpio-interface-board-back.JPG 150 × 127; 5 KB
 177px-Lo-tech-gpio-interface-board-back.JPG 177 × 150; 7 KB
 180px-GMR-head-structure.jpg 180 × 135; 7 KB
 180px-Lo-tech-8-bit-ide-adapter-rev3-schematic.png 180 × 139; 21 KB
 194px-Lo-tech-8-bit-ide-adapter-rev3-schematic.png 194 × 150; 23 KB
 706px-Lo-tech-gpio-interface-board-back.JPG 706 × 599; 68 KB
 707px-Lo-tech-gpio-interface-board-back.JPG 707 × 600; 68 KB
 776px-Lo-tech-8-bit-ide-adapter-rev3-schematic.png 776 × 600; 188 KB
 120px-Lo-tech-1MB-RAM-Board-schematic.png 120 × 93; 7 KB
 120px-Original-xtide-adapter.jpg 120 × 80; 3 KB
 120px-Tm100-alignment-photo-6.jpg 120 × 90; 9 KB
 180px-Lo-tech-1MB-RAM-Board-schematic.png 180 × 139; 11 KB
 180px-Original-xtide-adapter.jpg 180 × 120; 6 KB
 180px-Tm100-alignment-photo-6.jpg 180 × 135; 15 KB
 194px-Lo-tech-1MB-RAM-Board-schematic.png 194 × 150; 13 KB
 300px-Original-xtide-adapter.jpg 300 × 200; 14 KB
 450px-Original-xtide-adapter.jpg 450 × 300; 26 KB
 480px-Tm100-alignment-photo-6.jpg 480 × 360; 57 KB
 776px-Lo-tech-1MB-RAM-Board-schematic.png 776 × 600; 93 KB
 120px-Lo-tech-8-bit-ide-adapter-assembled.jpg 120 × 92; 3 KB
 120px-Lo-tech-gpio-interface-board-front-rev2.png 120 × 101; 26 KB
 149px-Lo-tech-gpio-interface-board-front-rev2.png 149 × 125; 38 KB
 180px-Lo-tech-gpio-interface-board-front-rev2.png 180 × 151; 51 KB
 197px-Lo-tech-8-bit-ide-adapter-assembled.jpg 197 × 150; 6 KB
 270px-Lo-tech-gpio-interface-board-front-rev2.png 270 × 226; 96 KB
 300px-Lo-tech-8-bit-ide-adapter-assembled.jpg 300 × 229; 12 KB
 450px-Lo-tech-8-bit-ide-adapter-assembled.jpg 450 × 343; 22 KB
 600px-Lo-tech-8-bit-ide-adapter-assembled.jpg 600 × 458; 34 KB
 600px-Lo-tech-gpio-interface-board-front-rev2.png 600 × 503; 275 KB
 786px-Lo-tech-8-bit-ide-adapter-assembled.jpg 786 × 600; 52 KB
 120px-IBM-PC-XT-Keyboard-Protocol-Sample.png 120 × 31; 6 KB
 120px-Nec-fd1157c-floppy-drive.jpg 120 × 100; 3 KB
 120px-Peacon-xt-cf-assembled.JPG 120 × 85; 3 KB
 300px-Lo-tech-gpio-interface-board-front-rev2.png 300 × 251; 111 KB
 300px-Nec-fd1157c-floppy-drive.jpg 300 × 250; 13 KB
 300px-Peacon-xt-cf-assembled.JPG 300 × 213; 12 KB
 360px-Lo-tech-gpio-interface-board-front-rev2.png 360 × 302; 143 KB
 450px-Lo-tech-gpio-interface-board-front-rev2.png 450 × 377; 191 KB
 600px-Peacon-xt-cf-assembled.JPG 600 × 427; 38 KB
 640px-IBM-PC-XT-Keyboard-Protocol-Sample.png 640 × 163; 53 KB
 800px-IBM-PC-XT-Keyboard-Protocol-Sample.png 800 × 204; 70 KB
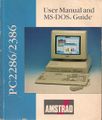 102px-Amstrad-PC2286.jpg 102 × 120; 4 KB
 120px-8bit-rom-board-rev2.jpg 120 × 67; 3 KB
 180px-8bit-rom-board-rev2.jpg 180 × 100; 5 KB
 180px-Amstrad-PC2286.jpg 180 × 213; 8 KB
 180px-Peacon-xt-cf-assembled.JPG 180 × 128; 5 KB
 270px-Amstrad-PC2286.jpg 270 × 319; 17 KB
 300px-8bit-rom-board-rev2.jpg 300 × 167; 13 KB
 360px-Amstrad-PC2286.jpg 360 × 425; 29 KB
 450px-8bit-rom-board-rev2.jpg 450 × 251; 26 KB
 450px-Peacon-xt-cf-assembled.JPG 450 × 320; 23 KB
 600px-8bit-rom-board-rev2.jpg 600 × 335; 45 KB
 120px-Lo-tech-8-bit-ide-front.png 120 × 98; 24 KB
 120px-Lo-tech-isa-compactflash-adapter-revision-2b-back.JPG 120 × 65; 4 KB
 180px-Lo-tech-isa-compactflash-adapter-revision-2b-back.JPG 180 × 98; 7 KB
 183px-Lo-tech-8-bit-ide-front.png 183 × 150; 50 KB
 200px-Lo-tech-isa-compactflash-adapter-revision-2b-back.JPG 200 × 109; 9 KB
 300px-Lo-tech-8-bit-ide-front.png 300 × 246; 111 KB
 450px-Lo-tech-8-bit-ide-front.png 450 × 369; 203 KB
 600px-Lo-tech-8-bit-ide-front.png 600 × 491; 295 KB
 732px-Lo-tech-8-bit-ide-front.png 732 × 599; 385 KB
 800px-8bit-rom-board-rev2.jpg 800 × 446; 70 KB
 800px-Lo-tech-isa-compactflash-adapter-revision-2b-back.JPG 800 × 436; 102 KB
 120px-Lo-tech-VGA-interface-board-front.jpg 120 × 101; 4 KB
 120px-Lo-tech-gpio-interface-board-back-assembled-rev2.JPG 120 × 120; 4 KB
 120px-RAM-and-EMS-Board-Slot-Bracket-r01.png 120 × 92; 7 KB
 148px-Lo-tech-VGA-interface-board-front.jpg 148 × 125; 6 KB
 180px-Lo-tech-VGA-interface-board-front.jpg 180 × 152; 7 KB
 196px-RAM-and-EMS-Board-Slot-Bracket-r01.png 196 × 150; 14 KB
 300px-RAM-and-EMS-Board-Slot-Bracket-r01.png 300 × 230; 27 KB
 450px-RAM-and-EMS-Board-Slot-Bracket-r01.png 450 × 345; 48 KB
 480px-RAM-and-EMS-Board-Slot-Bracket-r01.png 480 × 368; 53 KB
 600px-RAM-and-EMS-Board-Slot-Bracket-r01.png 600 × 460; 74 KB
 709px-Lo-tech-VGA-interface-board-front.jpg 709 × 599; 83 KB
 120px-Ibm-xt-64-256k-system-board-slot-8-marked.jpg 120 × 80; 3 KB
 125px-Lo-tech-gpio-interface-board-back-assembled-rev2.JPG 125 × 125; 4 KB
 125px-Lo-tech-gpio-interface-board-back-rev2.jpg 125 × 125; 7 KB
 180px-Ibm-xt-64-256k-system-board-slot-8-marked.jpg 180 × 120; 6 KB
 180px-Lo-tech-gpio-interface-board-back-assembled-rev2.JPG 180 × 180; 8 KB
 300px-Ibm-xt-64-256k-system-board-slot-8-marked.jpg 300 × 200; 17 KB
 450px-Ibm-xt-64-256k-system-board-slot-8-marked.jpg 450 × 300; 38 KB
 600px-Ibm-xt-64-256k-system-board-slot-8-marked.jpg 600 × 400; 66 KB
 600px-Lo-tech-gpio-interface-board-back-assembled-rev2.JPG 600 × 600; 65 KB
 800px-Ibm-xt-64-256k-system-board-slot-8-marked.jpg 800 × 533; 110 KB
 120px-Lo-tech-gpio-interface-board-back-rev2.jpg 120 × 120; 6 KB
 120px-Lo-tech-gpio-interface-board-front.JPG 120 × 102; 4 KB
 147px-Lo-tech-gpio-interface-board-front.JPG 147 × 125; 6 KB
 150px-Lo-tech-gpio-interface-board-front.JPG 150 × 127; 6 KB
 177px-Lo-tech-gpio-interface-board-front.JPG 177 × 150; 9 KB
 180px-Lo-tech-gpio-interface-board-back-rev2.jpg 180 × 180; 12 KB
 196px-Peacon-xt-cf-bracket.png 196 × 150; 18 KB
 200px-Peacon-xt-cf-bracket.png 200 × 153; 19 KB
 600px-Lo-tech-gpio-interface-board-back-rev2.jpg 600 × 600; 95 KB
 706px-Lo-tech-gpio-interface-board-front.JPG 706 × 599; 97 KB
 707px-Lo-tech-gpio-interface-board-front.JPG 707 × 600; 97 KB
 120px-Peacon-xt-cf-bracket.png 120 × 92; 9 KB
 180px-Peacon-xt-cf-bracket.png 180 × 138; 16 KB
 180px-Peacon-xt-cf.JPG 180 × 143; 7 KB
 300px-Peacon-xt-cf-bracket.png 300 × 230; 32 KB
 300px-Peacon-xt-cf.JPG 300 × 239; 18 KB
 301px-Peacon-xt-cf.JPG 301 × 240; 18 KB
 400px-Peacon-xt-cf-bracket.png 400 × 307; 50 KB
 480px-Peacon-xt-cf-bracket.png 480 × 368; 64 KB
 600px-Peacon-xt-cf.JPG 600 × 478; 72 KB
 603px-Peacon-xt-cf.JPG 603 × 480; 72 KB
 753px-Peacon-xt-cf.JPG 753 × 600; 106 KB
 120px-Peacon-xt-cf.JPG 120 × 96; 4 KB
 180px-CompactFlash-Adapter-for-Tandy-1400-Laptops-assembled.JPG 180 × 132; 6 KB
 300px-CompactFlash-Adapter-for-Tandy-1400-Laptops-assembled.JPG 300 × 220; 13 KB
 320px-CompactFlash-Adapter-for-Tandy-1400-Laptops-assembled.JPG 320 × 235; 15 KB
 450px-CompactFlash-Adapter-for-Tandy-1400-Laptops-assembled.JPG 450 × 330; 25 KB
 450px-Peacon-xt-cf.JPG 450 × 358; 41 KB
 600px-CompactFlash-Adapter-for-Tandy-1400-Laptops-assembled.JPG 600 × 441; 42 KB
 600px-CompactFlash-Adapter-for-Tandy-1400-Laptops-pcb.jpg 600 × 698; 75 KB
 640px-CompactFlash-Adapter-for-Tandy-1400-Laptops-assembled.JPG 640 × 470; 46 KB
 800px-CompactFlash-Adapter-for-Tandy-1400-Laptops-assembled.JPG 800 × 588; 67 KB
 103px-CompactFlash-Adapter-for-Tandy-1400-Laptops-pcb.jpg 103 × 120; 3 KB
 159px-Lo-tech-MIF-IPC-B-rev2-assembled-front.jpg 159 × 150; 5 KB
 180px-CompactFlash-Adapter-for-Tandy-1400-Laptops-pcb.jpg 180 × 209; 7 KB
 180px-Lo-tech-MIF-IPC-B-rev2-assembled-front.jpg 180 × 170; 6 KB
 200px-Yamaha-C1-IDE-Assembled-Back.jpg 200 × 140; 9 KB
 206px-CompactFlash-Adapter-for-Tandy-1400-Laptops-pcb.jpg 206 × 239; 9 KB
 300px-CompactFlash-Adapter-for-Tandy-1400-Laptops-pcb.jpg 300 × 349; 19 KB
 413px-CompactFlash-Adapter-for-Tandy-1400-Laptops-pcb.jpg 413 × 480; 37 KB
 450px-CompactFlash-Adapter-for-Tandy-1400-Laptops-pcb.jpg 450 × 523; 45 KB
 516px-CompactFlash-Adapter-for-Tandy-1400-Laptops-pcb.jpg 516 × 600; 57 KB
 800px-Yamaha-C1-IDE-Assembled-Back.jpg 800 × 560; 74 KB
 120px-600px-Bp-pin-cable-color.png 120 × 45; 6 KB
 120px-Lo-tech-MIF-IPC-B-rev2-assembled-front.jpg 120 × 113; 3 KB
 195px-Tandy-1400fd-catalogue-page.jpg 195 × 240; 16 KB
 200px-Tandy-1400fd-catalogue-page.jpg 200 × 246; 16 KB
 300px-Tandy-1400fd-catalogue-page.jpg 300 × 369; 35 KB
 390px-Tandy-1400fd-catalogue-page.jpg 390 × 479; 59 KB
 400px-Tandy-1400fd-catalogue-page.jpg 400 × 492; 63 KB
 488px-Tandy-1400fd-catalogue-page.jpg 488 × 600; 93 KB
 635px-Lo-tech-MIF-IPC-B-rev2-assembled-front.jpg 635 × 599; 51 KB
 636px-Lo-tech-MIF-IPC-B-rev2-assembled-front.jpg 636 × 600; 51 KB
 98px-Tandy-1400fd-catalogue-page.jpg 98 × 120; 4 KB
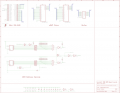
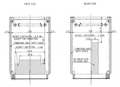
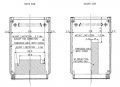
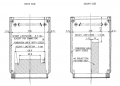
 120px-Tandy-1400-Expansion-Slot-PCB-Mechanical-Drawing.png 120 × 86; 5 KB
 180px-600px-Bp-pin-cable-color.png 180 × 67; 11 KB
 180px-Lo-tech-xt-cf-lite-rev2-schematic.png 180 × 117; 19 KB
 180px-Tandy-1400-Expansion-Slot-PCB-Mechanical-Drawing.png 180 × 130; 9 KB
 200px-Lo-tech-xt-cf-lite-rev2-schematic.png 200 × 130; 22 KB
 270px-600px-Bp-pin-cable-color.png 270 × 101; 19 KB
 320px-Tandy-1400-Expansion-Slot-PCB-Mechanical-Drawing.png 320 × 231; 21 KB
 360px-600px-Bp-pin-cable-color.png 360 × 134; 29 KB
 640px-Tandy-1400-Expansion-Slot-PCB-Mechanical-Drawing.png 640 × 461; 61 KB
 800px-Lo-tech-xt-cf-lite-rev2-schematic.png 800 × 518; 183 KB
 800px-Tandy-1400-Expansion-Slot-PCB-Mechanical-Drawing.png 800 × 576; 87 KB
 120px-Lo-tech-1MB-RAM-board-pcb.JPG 120 × 98; 4 KB
 120px-Lo-tech-xt-cf-lite-rev2-schematic.png 120 × 78; 10 KB
 120px-ST-251-heads.jpg 120 × 72; 3 KB
 180px-Lo-tech-1MB-RAM-board-pcb.JPG 180 × 147; 9 KB
 180px-ST-251-heads.jpg 180 × 109; 5 KB
 184px-Lo-tech-1MB-RAM-board-pcb.JPG 184 × 150; 9 KB
 187px-2MB-EMS-Board-r02-front.png 187 × 150; 47 KB
 200px-Lo-tech-isa-compactflash-adapter-revision-2-back.JPG 200 × 107; 7 KB
 320px-Lo-tech-isa-compactflash-adapter-revision-2-back.JPG 320 × 172; 17 KB
 734px-Lo-tech-1MB-RAM-board-pcb.JPG 734 × 600; 112 KB
 746px-2MB-EMS-Board-r02-front.png 746 × 600; 676 KB
 120px-ISA-ROM-Board-Assembled-solder-side.jpg 120 × 73; 3 KB
 120px-Lo-tech-isa-compactflash-adapter-revision-2-back.JPG 120 × 64; 2 KB
 180px-Lo-tech-isa-compactflash-adapter-revision-2-back.JPG 180 × 97; 6 KB
 200px-ISA-ROM-Board-Assembled-solder-side.jpg 200 × 122; 6 KB
 300px-Lo-tech-isa-compactflash-adapter-revision-2-back.JPG 300 × 161; 15 KB
 320px-Inside-ms-dos-figure-3.gif 320 × 149; 8 KB
 450px-Lo-tech-isa-compactflash-adapter-revision-2-back.JPG 450 × 242; 35 KB
 600px-Lo-tech-isa-compactflash-adapter-revision-2-back.JPG 600 × 322; 63 KB
 640px-Lo-tech-isa-compactflash-adapter-revision-2-back.JPG 640 × 344; 70 KB
 800px-ISA-ROM-Board-Assembled-solder-side.jpg 800 × 488; 66 KB
 800px-Lo-tech-isa-compactflash-adapter-revision-2-back.JPG 800 × 430; 105 KB
 120px-8bit-rom-board-assembled.jpg 120 × 59; 3 KB


